Creating a sick visit
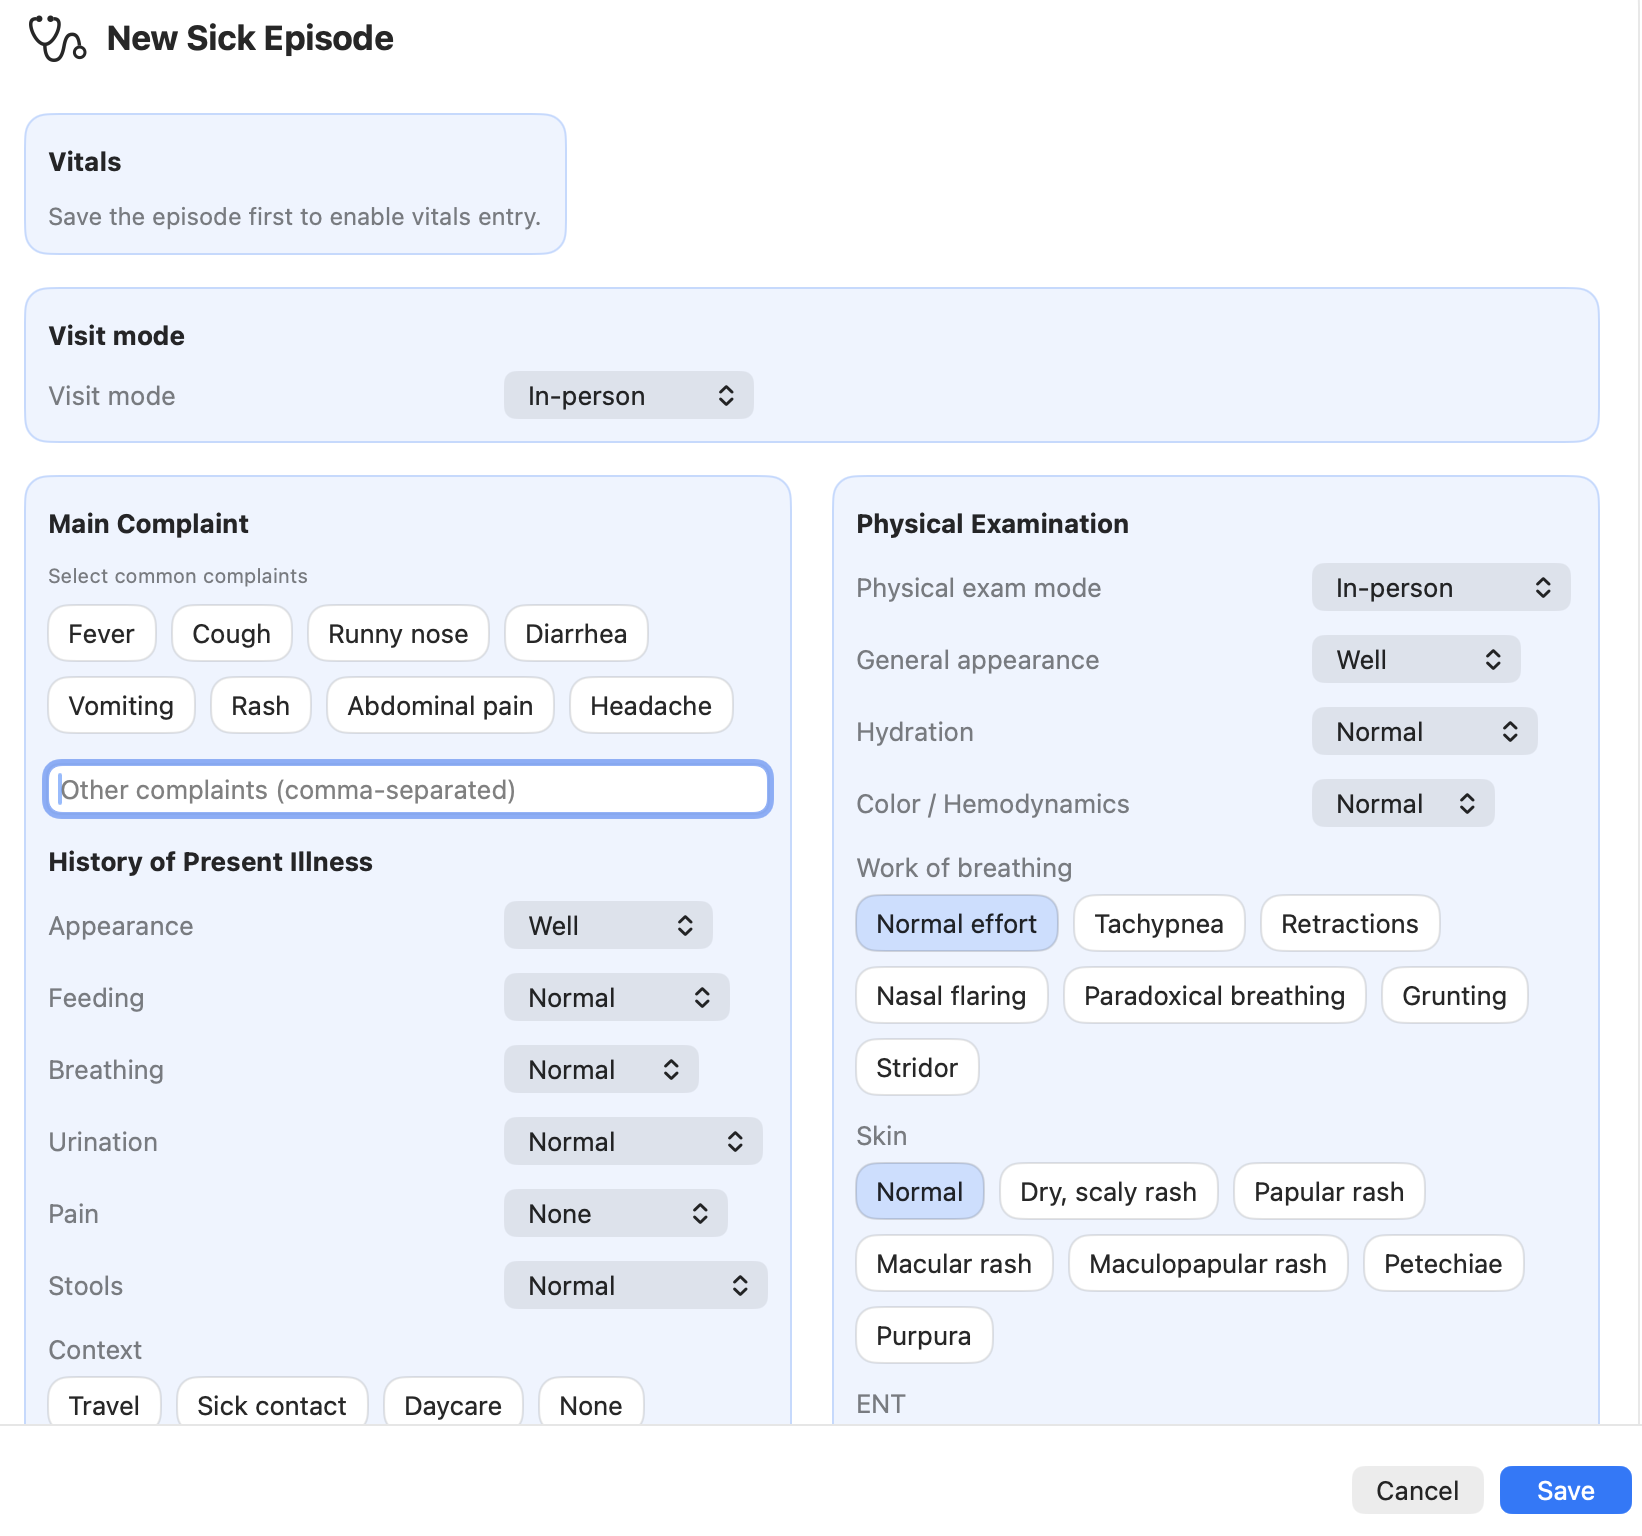
This page explains how to start and complete a sick visit episode in CareFlow Kids and describes the main sections of the episode form.
A sick visit represents a consultation for an acute medical problem (fever, cough, rash, abdominal pain, etc.).
Starting a new episode
- Select the patient bundle in the sidebar.
- Click New sick visit.
- The episode form opens.
- Click Save once to initialize the visit.
Saving the episode activates:
- vitals recording
- problem listing generation
- guideline evaluation
- report generation
Sections of the sick visit form
The episode form is structured so the consultation can follow a natural clinical workflow.
Consultation mode
Select how the consultation takes place:
- In-person (default)
- Telemedicine
This information may appear in reports and helps contextualize the clinical examination.
Chief complaint
The Motif principal section records the main reason for consultation.
You can:
- select one or more common complaints (fever, cough, vomiting, rash, etc.)
- add additional complaints in the free text field
- add a duration for each complaints (hours or days)
These entries help generate the problem listing later in the workflow.
History of present illness
This section captures the clinical context of the illness.
Typical structured elements include:
- general condition
- feeding
- respiration
- urination
- pain
- stools
Additional contextual tags may include:
- travel
- sick contacts
- daycare exposure
A free text summary field allows a narrative synthesis of the history.
Physical examination
The examination panel records structured findings across organ systems.
Typical sections include:
- general appearance
- hydration
- hemodynamic status
- respiratory effort
- skin
- ENT findings
- lungs
- heart
- abdomen
- neurologic status
- lymph nodes
A free text complement on physical examination allows relevant details on physical finding to be added.
Many findings are selected using structured clinical tags, which allows:
- automated problem listing
- guideline rule matching
- AI clinical support
Problem listing
Click Generate problem listing to automatically summarize relevant clinical findings.
The system analyzes locally:
- symptoms
- physical examination findings
- contextual information
The generated list can be edited manually if needed.
Guideline signals
Click Update guideline flags to evaluate the episode against available clinical guidelines.
This may generate:
- rule alerts
- clinical indicators
These signals support clinical reasoning but do not modify the record automatically.
Complementary investigations
This field records any investigations performed or planned in a free text form.
Examples:
- blood tests
- urine analysis
- imaging
Results may be documented directly or attached later as documents.
Working diagnosis
The working diagnosis summarizes the clinician's interpretation of the episode.
You may also record:
- an ICD‑10 code (optional), manually or after a suggestion from AI if AI has been queried.
Plan
The Plan field records the clinical management.
Examples:
- treatment
- follow‑up plan
- parental guidance
A structured anticipatory guidance selector may also be used for common items (URI, UTI, ...), signalling which information has been communicated to the family.
AI clinical assistant
The AI assistant can provide:
- clinical suggestions
- differential diagnosis ideas
- guidance based on entered data
AI output is informational only and should always be reviewed with clinical judgment.
Finishing the visit
- Review the episode.
- Click Save.
- Click Done / End to close the form.
The episode is now part of the patient's longitudinal medical record.
You may then:
- generate a report from the visit list (Details button)
- export the updated
.pemrbundle to share the cumulative record with the family
Deleting or restoring a visit
Episodes can be deleted or restored from the visit list.
To do this:
- Open the visit list for the patient.
- Right‑click the visit you want to manage.
- Choose Delete or Restore depending on the situation.
Deleting a visit does not necessarily mean the information is permanently lost. A deleted visit can be restored later if needed.
This allows the clinician to correct mistakes (for example a visit created by accident) without permanently removing the clinical information.
Screenshots
Screenshot (TODO)